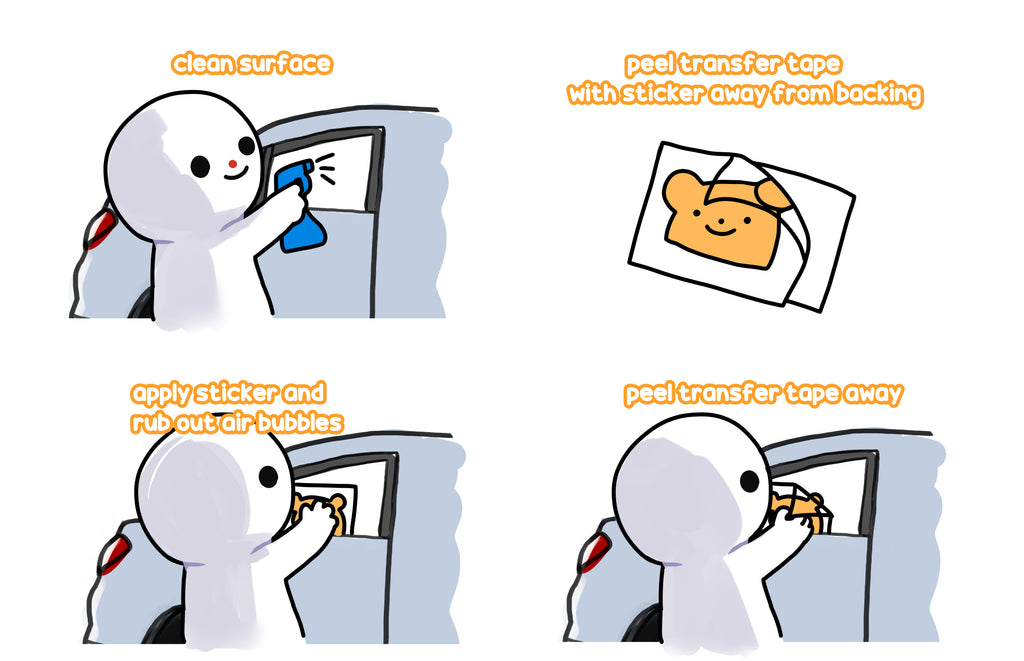
How to place car window stickers and vinyl decals with no bubbles!
Thank you for purchasing a peeking sticker from my shop! Anime stickers are a cute and fun way of personalizing your car with your favorite anime characters. I get asked a lot of questions from customers on how to properly place their new stickers on their vehicles. I realize it can get tricky so let’s get started!
Step 1
The first step is to clean the surface you want to place the anime car sticker on. My stickers are safe your car window, PC case, and even refrigerator! You could use any cleaner of your choice. After you apply cleaners such as rubbing alcohol or car wash soap, you can wipe with a cloth afterward. The important part is to make sure you let it dry completely because the sticker will not be able to stick to a wet surface.
Step 2
The second step is to peel off the backing tape that is on the peeker sticker. I recommend peeling off the backing step by step as you stick it onto your surface so it is placed smoothly. For those of you that are confident or have experience, you can choose to do it in one sweeping motion.
Step 3
The third step in placing the anime peeker sticker is to rub the air bubbles out of the sticker. This part can get annoying at first if you encounter any, but don’t worry, they’re easy to remove. Just apply pressure on to where the bubbles are, and push them towards the edge. If you’ve done this correctly, you should see a completely even surface on your sticker!
If you still can’t get the annoying bubbles out, don’t worry. There are other ways to get bubbles out of your anime peeking sticker. Just to make it convenient for you, I’ll name two of the best ways that I’ve found.
One easy method that I use to fix the anime car sticker is by using heat. If you use something like a hairdryer, you should be able to briefly apply hot air toward your anime car decal. How this works is that it makes the bubbles softer, making it easy to flatten them out!
Now if you don’t have a way of applying heat, don’t worry. You can try using a small pin to poke a tiny hole into the bubble. Even a little pressure is fine. If you’re worried about damaging the anime car decal, just know that once you flatten and smooth out the bubble, the hole should go away. Easy as that.
Step 4
After about half an hour, you should remove the transfer tape that is on top of the sticker. Removing it without waiting might make the process more difficult. Afterward, enjoy your anime decal! Patience is key :)

Find more stickers and cute anime accessories and gifts at Ahhgela!
Continue reading
